Have you ever seen those blogs that has a tabbed widget area in the
sidebar consisting of popular, recent and features posts within a single
click? It is more commonly known as jQuery Tabbed widget, which allows
you to save a lot of space in the sidebar keeping the interface user
friendly for your users by combining 3 different widgets into just one.
In this article, we will be showing you how to add a jQuery Tabbed
Sidebar Widget in Blogger.
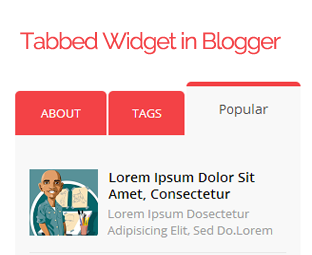
What is a jQuery Tabbed Widget?
You would have seen a lot of websites that has a tabbed widget at the very top of their sidebar that keeps three widgets at just one place providing you the ability to select one to view among them. It not only allows you to save a bit of space in the sidebar but also keeps your blog design clean and professional.A lot of big named popular websites are using the same technique to display more widgets within less space. In this article, we will be showing you a way how to add a jQuery tabbed sidebar widget in blogger and would guide you through each and every step in detail.
Creating jQuery Tabbed Widget in Blogger:
The very first thing you need to do is to go to Blogger >> Template >> Edit HTML and paste the following CSS coding just above the ]]></b:skin> tag. If you have a separate CSS Style sheet file then you can also add the following CSS to it./* Tab Widget */
.tabviewsection {
background: #f8f8f8;
text-transform: uppercase;
border-bottom: 5px solid #f34246;
border-bottom-left-radius: 6px;
border-bottom-right-radius: 6px;
float: left;
width: 100%;
}
.tabs-widget {
list-style: none;
list-style-type: none;
margin: 0 0 10px 0;
padding: 0;
}
.tabs-widget li {
list-style: none;
list-style-type: none;
padding: 0;
float: left;
border-right: 2px solid #fff;
}
.tabs-widget li a {
color: #fff;
display: block;
padding-right: 16.5px;
padding-left: 16px;
font-size: 13px;
padding-top: 15px;
padding-bottom: 15px;
text-decoration: none;
border-top-left-radius: 5px;
border-top-right-radius: 5px;
}
.tabs-widget-content {
}
.tabviewsection {
margin-top: 10px;
margin-bottom: 10px;
}
.tags_tab {
width: 80px;
text-align: center;
}
.about_tab {
width: 96px;
text-align: center;
}
li.laster {
border: 0px;
width: 120px;
text-align: center;
}
.blog-mobile-link {
display: none;
}
.tabs-widget li a {
padding-right: 20px;
padding-left: 20px;
}
.tabs-widget {
height: 51px;
}
.tw-authors {
width: 570px;
}
.tabviewsection h2 {
display: none;
}
.tabs-widget li a.tabs-widget-current {
padding-bottom: 20px;
margin-top: -10px;
background: #f8f8f8;
color: #444;
text-decoration: none;
border-top: 5px solid #f34246;
font-size: 14px;
text-transform: capitalize;
}
.tabs-widget li a {
background: #f34246;
}
Now this step entirely depends on the coding of your blogger template as different designers have different way of coding but we will share a way that is used more commonly in the template. You have to look up to the code of your Sidebar widget area. Search for <div id='sidebar-wrapper'> and just below it paste the following piece of coding
<!-- Tab Widget [start] -->
<div class='tabviewsection'>
<script type='text/javascript'>
jQuery(document).ready(function($){
$(".tabs-widget-content-widget-themater_tabs-1432447472-id").hide();
$("ul.tabs-widget-widget-themater_tabs-1432447472-id li:first a").addClass("tabs-widget-current").show();
$(".tabs-widget-content-widget-themater_tabs-1432447472-id:first").show();
$("ul.tabs-widget-widget-themater_tabs-1432447472-id li a").click(function() {
$("ul.tabs-widget-widget-themater_tabs-1432447472-id li a").removeClass("tabs-widget-current a");
$(this).addClass("tabs-widget-current");
$(".tabs-widget-content-widget-themater_tabs-1432447472-id").hide();
var activeTab = $(this).attr("href");
$(activeTab).fadeIn();
return false;
});
});
</script>
<ul class='tabs-widget tabs-widget-widget-themater_tabs-1432447472-id'>
<li class='about_tab'><a href='#widget-themater_tabs-1432447472-id1'>About</a></li>
<li class='tags_tab'><a href='#widget-themater_tabs-1432447472-id2'>Tags</a></li>
<li class='laster'><a href='#widget-themater_tabs-1432447472-id3'>Popular</a></li>
</ul>
<!-- Tab Widget 1 -->
<div class='tabs-widget-content tabs-widget-content-widget-themater_tabs-1432447472-id' id='widget-themater_tabs-1432447472-id1'>
<b:section class='sidebar' id='sidebartab1' preferred='yes'>
</b:section>
</div>
<!-- Tab Widget 2 -->
<div class='tabs-widget-content tabs-widget-content-widget-themater_tabs-1432447472-id' id='widget-themater_tabs-1432447472-id2'>
<b:section class='sidebar' id='sidebartab2' preferred='yes'>
</b:section>
</div>
<div class='tabs-widget-content tabs-widget-content-widget-themater_tabs-1432447472-id' id='widget-themater_tabs-1432447472-id3'>
<!-- Tab Widget 3 -->
<b:section class='sidebar' id='sidebartab3' preferred='yes'>
</b:section>
</div>
</div>
<!-- Tab Widget [endt] -->
Once everything is done and dusted, save the template by pressing “Save Template” at the top. Now go to Layout area and you would notice three widget areas just above your sidebar. You can add widgets two those three areas and it appear in form of tabs when you view it live on your site.
0 comments:
Post a Comment